
.svg)
.svg)


Intune
Use Cloud PKI with Intune – Part 2: Device Configurations
.png)
By
.png)
This is some text inside of a div block.
In part one of this series, we set up the Cloud PKI infrastructure, including the Root CA, Issuing CA, and NDES/SCEP service. Now, we will ensure that devices receive a certificate that they can use for authentication, such as for Wi-Fi access. Let’s get started.
Deploy Root Certificate for Devices
Since our Certificate Authority (CA) is internal and not publicly trusted, we need to ensure that devices recognize it as a trusted authority. This is achieved by deploying the Root Certificate via a Trusted Certificate configuration in Intune.
Step 1: Download the Root Certificate
- Navigate to Intune Admin Portal →Tenant Administration → Cloud PKI, then select the Root CA.

- Click Download to download the public part of the Root CA in .cer format.
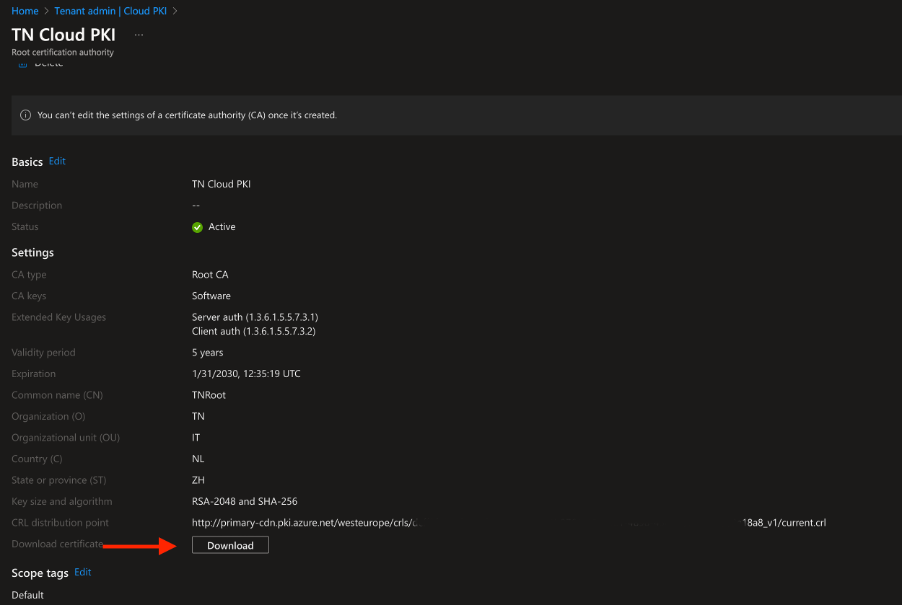
This will download the Root Certificate to your browser.
Step 2: Deploy the Root Certificate Using Intune
- Go to Intune Admin Portal → Devices → Windows → Configuration profiles → Create a policy.
- Select Platform: Windows 10 and later, then choose Profile type: Templates → Trusted certificate.
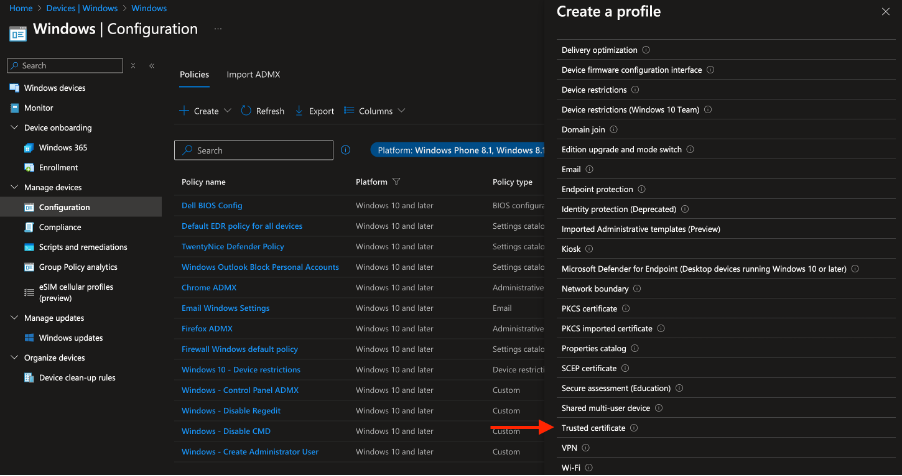
- Click Create, then name the configuration (e.g., TN Trusted Root) and click Next.
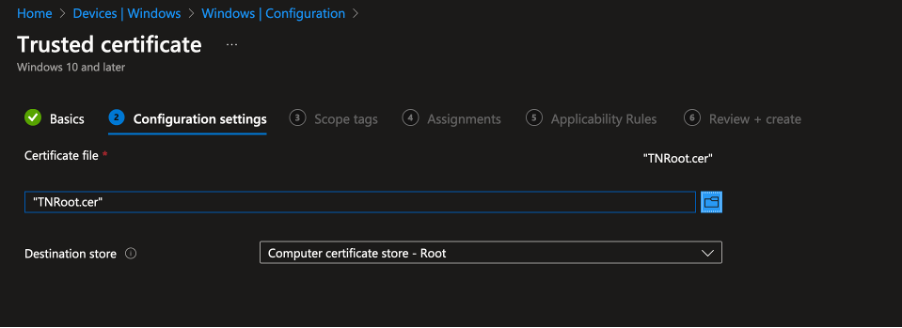
- Under Certificate file, upload the Root CA file downloaded earlier.
- Keep Destination store set to Computer certificate store – Root, as we are deploying the company’s Root Certificate to the trusted root store on client devices.
- Assign the configuration to a group containing either users or, preferably, devices.
One of the benefits is assigning to devices ensures that the certificate is available before login
Create and Configure SCEP Profile
Now, we will configure SCEP (Simple Certificate Enrollment Protocol) to issue client certificates from the Issuing CA to enrolled devices.
Step 1: Create a SCEP Configuration Profile
- Go to Intune Admin Portal → Devices → Windows → Configuration profiles → Create a policy.
- Select Platform: Windows 10 and later, then choose Profile type: Templates → SCEP certificate.
- Click Create, then give the profile a name (e.g., TN SCEP Configuration).
Step 2: Configure the SCEP Profile Settings
Here are the key settings to configure:
This is my Configuration:

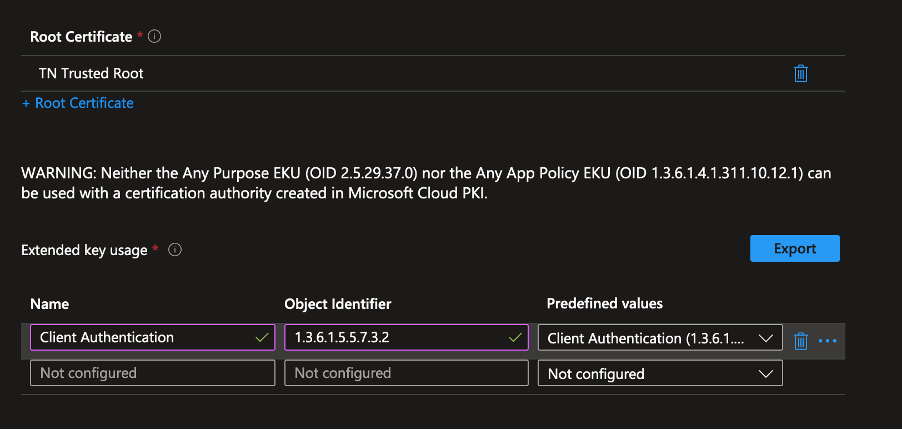
Step 3: Assign the RootCertificate & SCEP Server URL
- Under Root Certificate, select the Trusted Certificate profile created earlier.
- Set Extended Key Usage to match the intended purpose (e.g., Client Authentication).
- Leave Renewal Threshold at the default 20%, meaning the renewal process begins when 20% of the certificate’s lifetime remains.
- Copy the SCEP URL from Intune Admin Portal → Tenant Administration → Cloud PKI → Issuing CA.
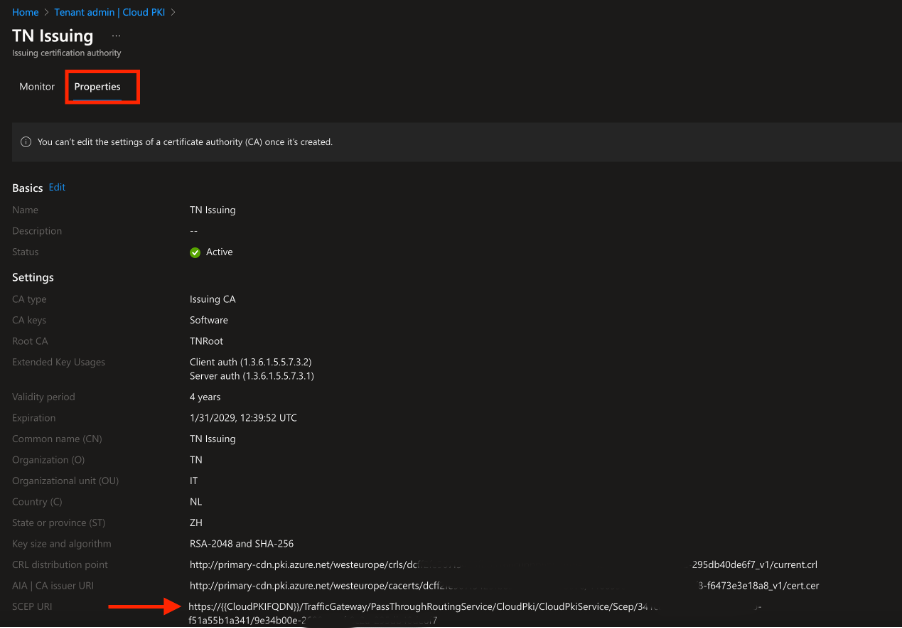
- Paste the SCEP URL into the SCEP Server URLs field.

Validate Certificate Deployment on Devices
Now lets have a quick look on the client device itself. The previous steps are almost identical for iOS, Android and Windows. In this example I use Windows. When I open the Computer Certificate Store I find the client certificate issued by my Issuing CA:

Conclusion
At this stage, your Intune-managed devices have successfully received a trusted Root CA and a client certificate via SCEP. This enables secure authentication for Wi-Fi, VPN, or other enterprise services.
In a follow up post, we will use this certificate to authenticate against Azure Key Vault and securely retrieve secrets using PowerShell. Stay tuned! 🚀


.jpg)
.png)
.png)
